|
This tutorial shows you how to set up Microsoft Outlook 2013 (for Windows laptops / tablets) to receive emails from your email account. Please note that this setup is only useful for those that wish to access your emails on your Laptop or Windows Tablet. If you are setting this up on a Desktop computer (not a laptop), please follow this guide. 1. After starting Outlook 2013 for the first time, read and follow the prompts as needed until you get to the 'home screen' (shown below). Once you're there, click 'File'.
2. Click on Account Settings
4. Click New...
5. Click Manual setup or additional server types. 6. Click Next.
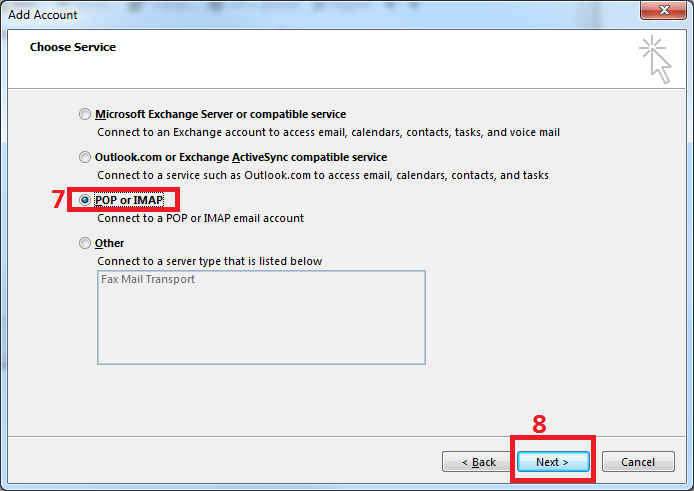
7. Click 'POP or IMAP'. 8. Click Next.
9. Enter in your details. Once you've entered the below in, click the More Settings … button. Your Name E-mail Address Account Type Incoming mail server Outgoing mail server (SMTP) You will need your Outgoing Mail Server address. This should be set to mail.YourWebsiteName.com.au User Name Password Select the tick box that says Remember password. Once you've entered the above in, click the More Settings … button.
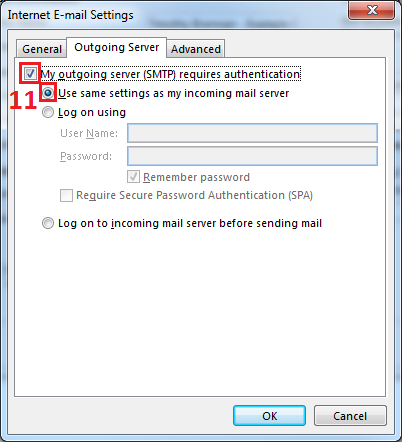
10. When this screen shows up, click on the 'Outgoing Server' tab.
11. In the Outgoing Server tab, click to select the two checkboxes shown below.
12. Click on the 'Advanced' tab. Here you will need to edit the sections highlighted by red to be exactly what is shown below. Once you are done, click 'OK'. Then you will need to set up the automatic deleting of your email messages from the server after a certain number of days - select the number of days you want to leave the message on the server before it is deleted (between 14-30 days is suggested). If emails are not being removed from the server automatically after a period of time (14-30 days) your inbox will fill up. If the Inbox fills up, emails will not be received until you contact Support and get your email account quota temporarily increased.
13. You should be taken back to the window shown below. Click 'Next'. This will run a test to see if your settings are correct.
14. You will see the below window when it starts testing.
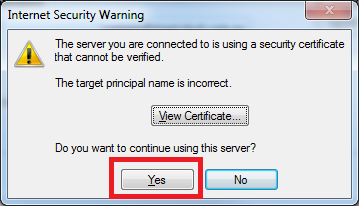
When the below message comes up, click 'Yes'. Note: You will need to do this each time you completely exit and then re-enter Outlook. If you do not exit Outlook constantly, or turn off your computer and only put your laptop or tablet to sleep, this should not come up much, if at all.
15. Once the test is complete, click 'Close'.
All done! Double check you can send emails by sending an email to a different account of yours, and reply to that email as well to ensure you can receive emails as well. Double check the spelling of your name, and if you have any problems with your mail setup, please don't hesitate to contact support on support@magicdust.com.au
|
.png)
.png)
.png)

.png)
.png)